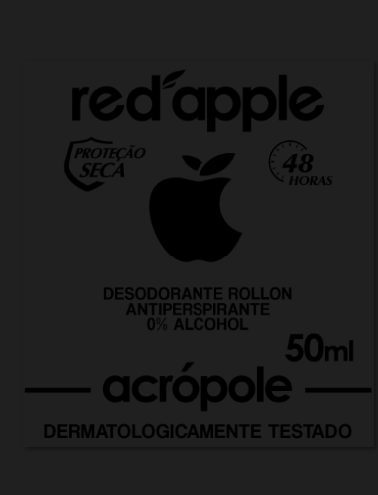
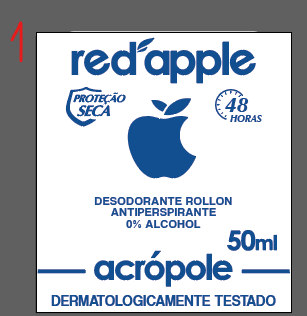
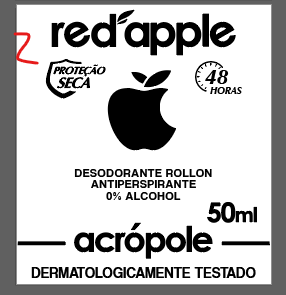
I need to leave this label with some metallic parts, I have the black file to mask these parts. How do I do it? The BG of label is plastic.

I need to leave this label with some metallic parts, I have the black file to mask these parts. How do I do it? The BG of label is plastic.

I don’t know if that would be it, but I have a base label that will be applied as matte (1), however there are some metallic parts on this same label (2). I have the label file and a black mask where the metallized parts will be inserted. I’m not sure what this arrangement would look like in the material graph. The entire product is plastic, what I’m not getting is the label itself. I could make the metallic parts I want in Illustrator, separate it, but here at the company they use this mask to print the real product.


Im not sure what you mean either.
My understanding is that you want the blue section to be plastic, and the white section to be metallic? so you want to use number 2 as a mask so that you see both…
If this is the case then just use one label. If your labels 1 and 2 are slightly different this method still works you’ll just need to use each label as a mask…
Overview/Result
Method
Add you coloured label where you want it, put it as a diffuse in the material choice you want.
Use a colour to number on you coloured label (or use your black mask). Plug in to opacity. when this node is selected hit C on keyboard to view it. Adjust the settings (mainly input from - increase) to get it black and white.
Anywhere white will be visible anywhere black is a mask. Use a colour invert on the plastic label opacity, and use the colour to number on the metal one. Now they both have opposite masks.
In fact, it is the blue section that would be the metallic part and the white section is the plastic. We used black layer to mask the blue section that would be metallic. I understand that I could use the png of the label and overlay it to transform it into metallic, in this case, however, in other products we have a lot of details, so I wanted to understand this concept to use in the keyshot. If you can demonstrate this to me, and thank you for the answer
I would do the same as shown but:
switch the “colour invert” from going to the plastic opacity to the metal opacity.
Then switch the “colour to number” that is going to the metal opacity in to the plastic opacity.
By doing this you have essentially switched the masks over now the blue section is the metal and the white is the plastic.
If you intend to do this more, I would simply use PNG textures for each material type label, it’s far easier. This is still fairly simple once you get your head around the colour to number node to make things black and white (or shades of grey) to make your mask.
A simpler answer now I think I understand is for you just to use the (black and white label (2)).
have that go in to a colour invert node, then in to metal and on to your object.
Like Harry also mentioned, just work with black/white images in the opacity input of labels.
Make a plastic type material and put it as label input
Use a vertex color to drive the diffuse of that plastic, this keeps you flexible for the layer color
Use a black/white image where white resembles all colored plastic text of the label.
Make a metal materiial and connect it to the label input
Use a black/white image where white resembles the metal parts.
This way you stay flexible in the appearance since you can keep changing the materials since they are not depending on an image color of a texture, just an opacity mask.
If you want to be able to move the labels at the same time you can connect both labels with the same 2D-Mapping node, so you can tweak position as well in one go.
This workflow will need you to make 2 image masks to be used.
You could exchange this method using only one image where you basically use the different channels of the image as a mask. So for example your red channel resembles the ‘plastic mask’ and the blue channel you use for the metal mask. Those you can than split with the Color To Number to drive the opacity again on both the plastic label as the metal part.
You could than extend that texture using the green channel which you will use for roughness of both plastic and metal.
By doing this you save on VRAM since you will only need one texture. Games use this a lot. Since opacity mask only need to be greyscale you can use the image channels to store that information. While it would look odd at your screen as an image all channels separately make sense.
This is for example a livery I created for FlightSim. Here the RED channel is used for ambient occlusion, the green for roughness and the blue for metallic. That varies a bit from game to game but it helps to keep the VRAM usage within limits.
If you need ‘shades’ of opacity or roughness, it’s good practice to use a 16-bit or 32-bit images. This way you’re not limited to just 256 shades of grey. Since KeyShot translates 16-bit to 32-bit I would just use 32-bit. This is not needed with the label in your example since you only need a black/white with some anti-aliased edges as a mask not something like a gradient.
Hope this was a bit clear.