


I’ve been experimenting with illuminated surfaces and decals to create conceptual trading cards. I know I have a long way to go, but I’m pretty proud I was able to figure out the process through trial and error.

My name is Paul and I am a 3D designer


Really nice! Used a gradient for the glowing part?
Yes, exactly! 
Nice tutorial by Liam Martin on Youtube.

Raman, this is truly awesome, which part you are in india?
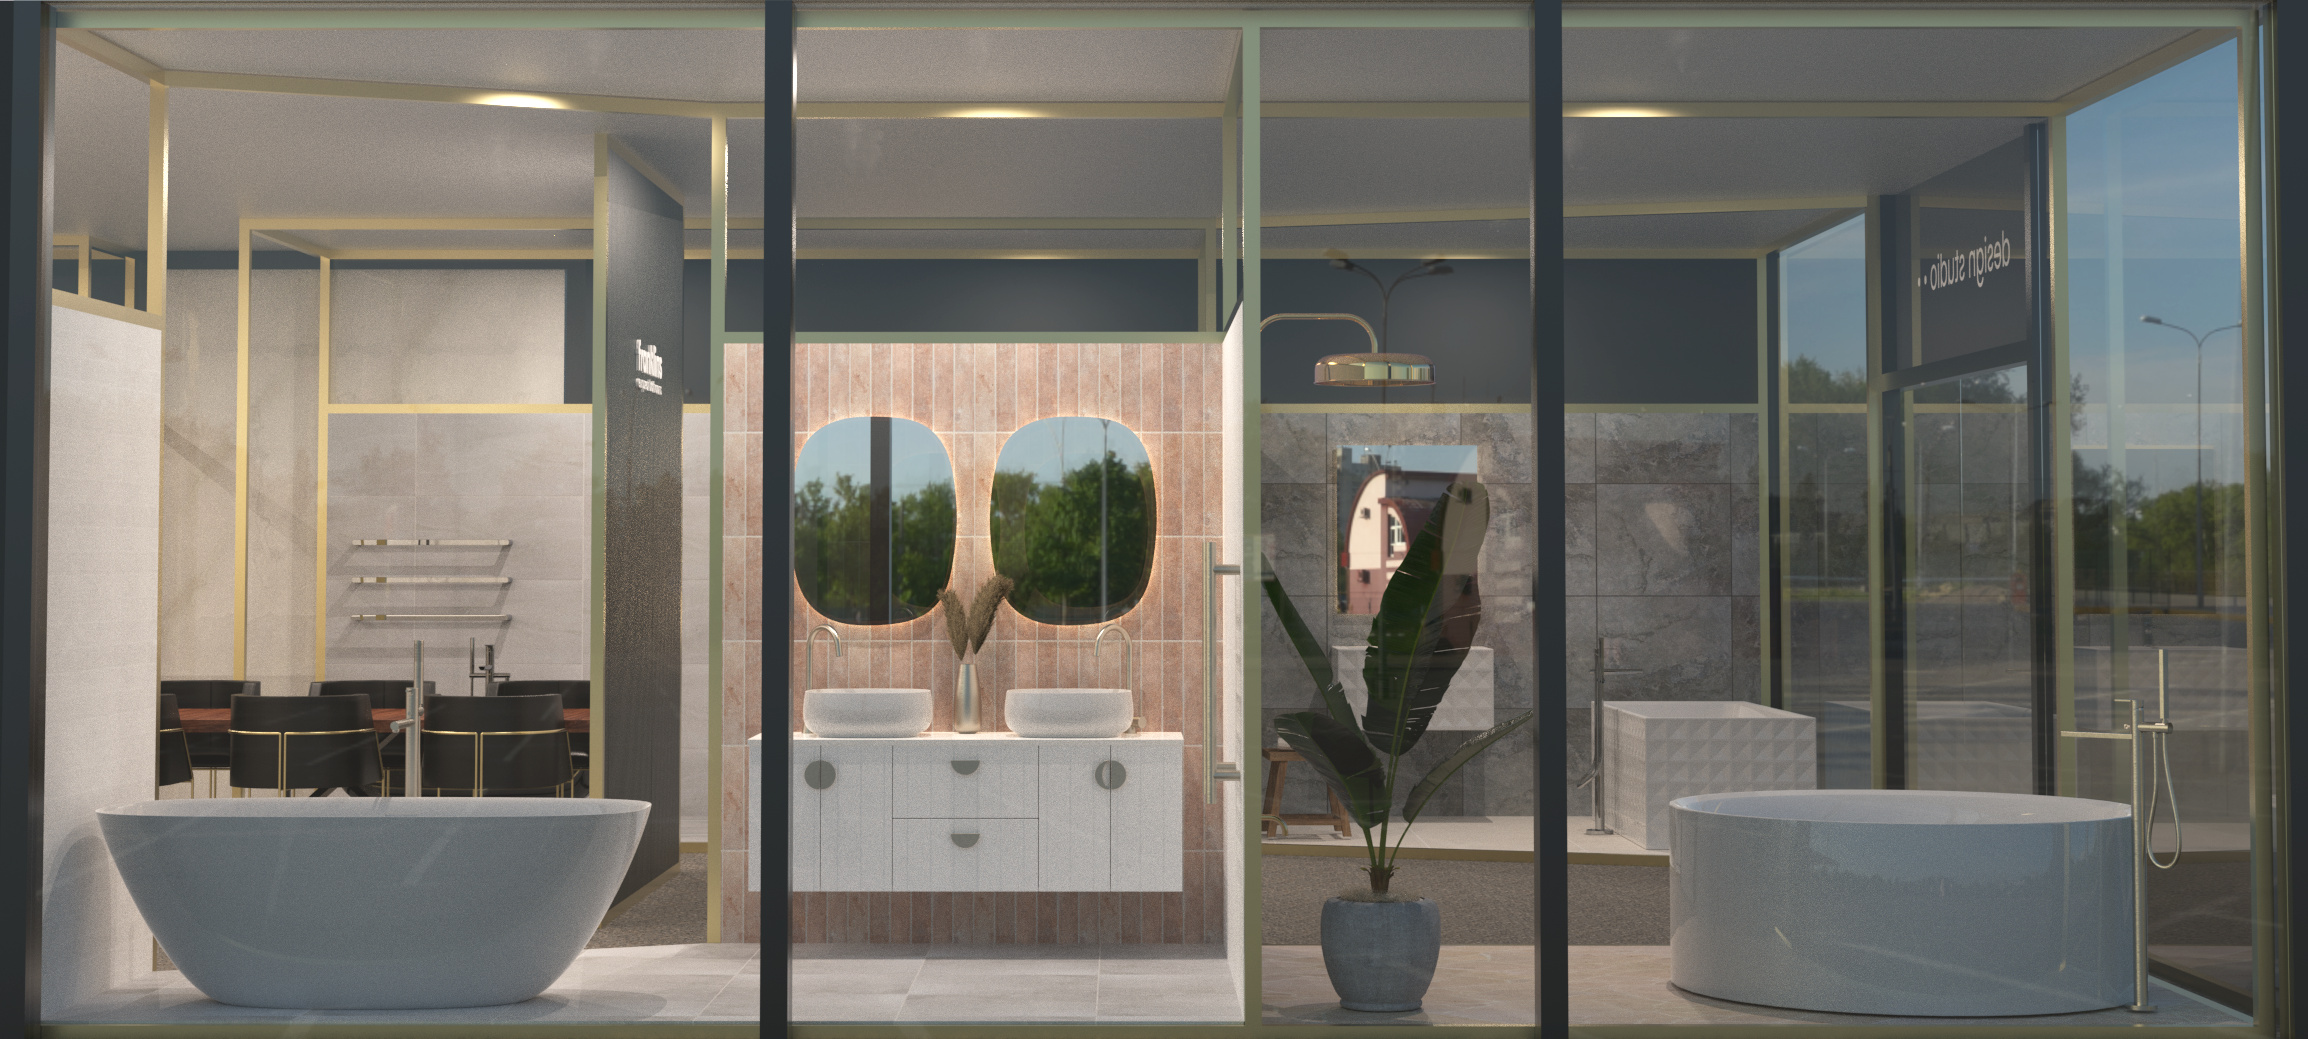
Here is a render from one of my showroom designs for Franklins. If anyone has any tips or tricks to improve my interior rendering I’d love to hear it
Hi Hilary! I’m not sure if that image is a final rendering, but the first thing I noticed was that there’s quite a bit of noise in it. I would recommend you to try longer render times/more samples or use the denoise tool to get rid of the grainy areas. It should make the image look much sharper!
Other than that I think it looks great!
Hi Joakim,
This one was done a while ago so I can’t remember the exact render parameters. I usually render on a max renders time of 1 or 2 hours. What would you recommend as a suitable render time or max samples. I prefer max time so I can quantify when the render will be finished.
Unfortunately I won’t be of much help if you want to use max time when you render. I almost never use max time, instead I opt for max samples. Simply because my scenes vary so much and it’s really hard to estimate how long they will need to render to look finished. Some of my product scenes only take 30 minutes to be rid of all noise, while my interior renders easily can take 12 hours or more to finish most of the time. Since I don’t want to have to deal with an interior rendering that I’ve started on a guessed 10 hours max time just to realize that it’s not really finished, I prefer to put a max sample value instead.
I usually just go for somewhere between 1000 to 2000 samples on interior renderings depending on what kind of materials I’ve used. But if you want to be sure that you get a good result at the least amount of time, you can use the region render feature to figure out what sample value you need. If you have the heads up display visible you can then use a small region render on the areas that you figure will take the longest time to finish, and just wait until all noise is gone and check how many samples the HUD tells you it have processed. Then you can input that sample value in your render settings as max samples and you should get a great result. If you’re in a hurry you could probably lower the max samples slightly and activate “Denoise” at 0.5-1 strength instead, and you should get a perfectly acceptable result as well.
If this was confusing or hard to follow (I’m not the best at explaining) I suggest you watch this video by @will.gibbons, it explains this exact process in great detail:
How to Set KeyShot Render Samples & Settings - YouTube
Hi everyone! Just introducing myself and dropping in a recent rendering with a little post work done in photoshop! My name is Marina and I am a graphic designer, I don’t have a long background in rendering I just really jumped in to Keyshot at the end of last year, but I am learning and falling in love with the possibilities of what can be created.

Thankyou Joakim, this is very helpful I will definitely try max samples next time I am attempting a interior render


